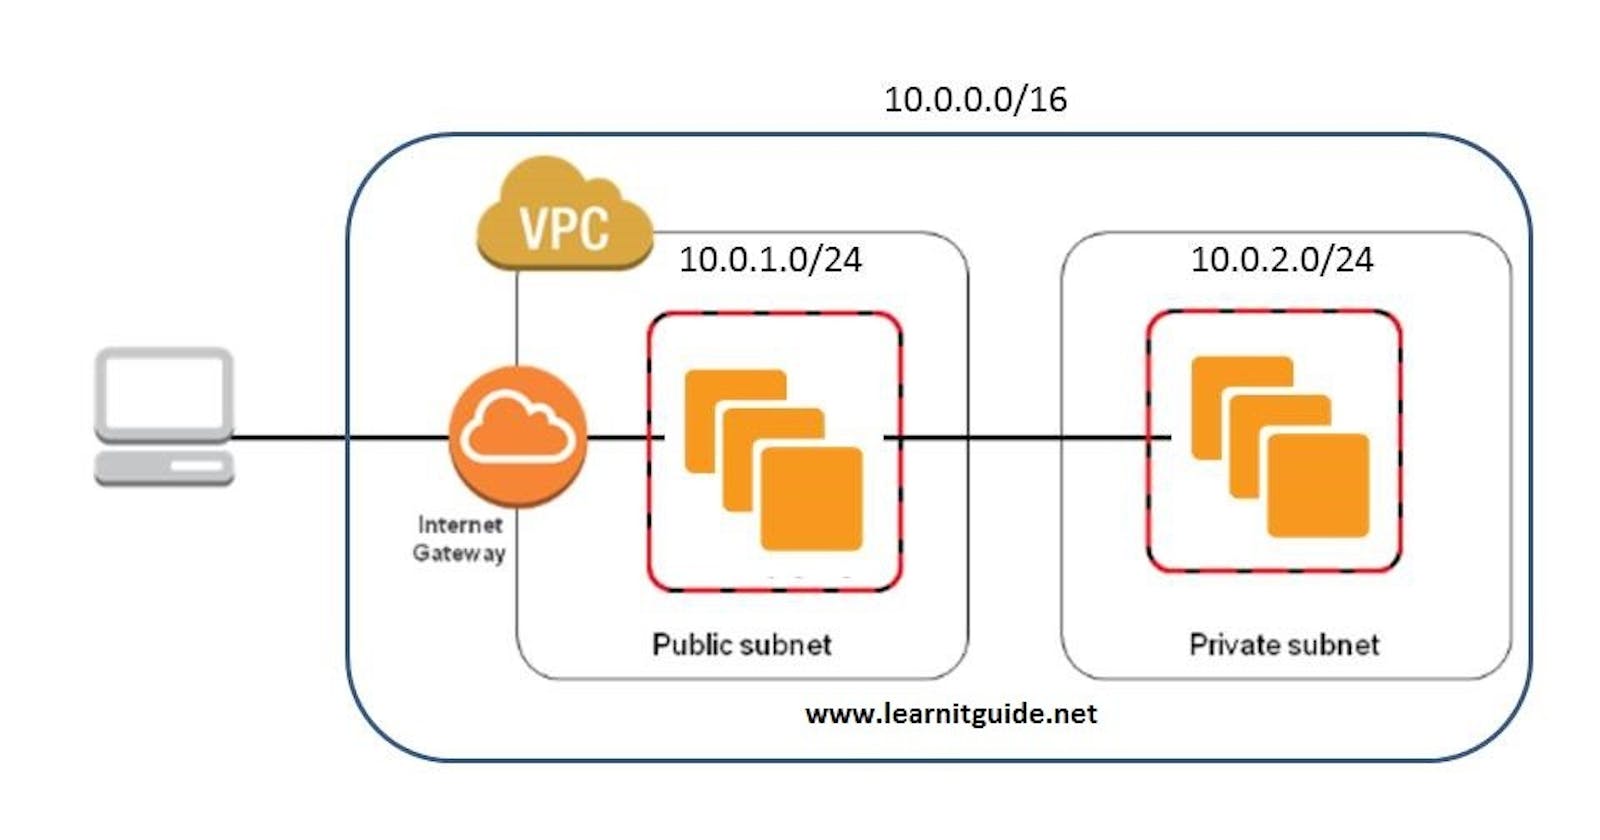
In the realm of cloud computing, a Virtual Private Cloud (VPC) is a fundamental building block that provides a secure and isolated virtual network environment within a cloud service provider's infrastructure, such as Amazon Web Services (AWS), Microsoft Azure, or Google Cloud Platform (GCP).
🌐 What is VPC?
VPC is a virtual network dedicated to your AWS account.
It allows you to logically isolate resources, such as virtual servers and databases, within the cloud.
Think of VPC as your own private data center in the cloud, where you have full control over networking configurations.

🔒 Key Features of VPC:
Isolation: VPC ensures that your resources are isolated from other users' resources, providing security and privacy.
Customization: You can customize IP address ranges, subnets, route tables, and network gateways according to your requirements.
Security: VPC allows you to implement security measures such as network access control lists (ACLs) and security groups to control inbound and outbound traffic.
🔧 Use Cases of VPC:
Hosting Applications: Deploy web servers, application servers, and databases within a VPC for hosting your applications securely.
Data Analytics: Run data processing and analytics workloads in a VPC to securely analyze large datasets.
Hybrid Cloud: Establish a secure connection between your on-premises data center and the cloud using VPC peering or Virtual Private Network (VPN) connections.
🛠️ Components of VPC:
Subnets: Subdivide the VPC's IP address range into smaller segments to organize resources.
Internet Gateway: Provides internet access to resources within the VPC.
Route Tables: Define routes for network traffic within the VPC.
Network Access Control Lists (ACLs): Act as a firewall at the subnet level to control traffic.
Security Groups: Control inbound and outbound traffic at the instance level based on rules.
💡 Benefits of VPC:
Scalability: Easily scale your infrastructure up or down based on demand.
Cost-Effectiveness: Pay only for the resources you use, with no upfront costs or long-term commitments.
Flexibility: Customize network configurations to meet the specific requirements of your applications.
Setting Up VPC with Public and Private Subnets
Creating a VPC: Step-by-Step
🔹 Create VPC
Name: MY_VPC {
helps in easy identification and organization of resources within your AWS account.}IPv4 CIDR: Specify CIDR block For example
10.0.0.0/16Choose an appropriate CIDR block to define the range of IP addresses available for use within your VPC

🔹 Create Subnets
Create 4 subnets: { 2 Public , 2 Private }
Use the VPC ID
MY_VPCto create subnets.Subnet Name: Choose { public-1 , public-2 }
Availability Zone: Select the availability zone for redundancy.
Public-1 Subnet CIDR block For example
10.0.1.0/16Public-2 Subnet CIDR block For example
10.0.2.0/16Subnet Name: Choose { Private-1 , Private2 }
Availability Zone: Select the availability zone for redundancy.
Private-1 Subnets CIDR block For example
10.0.3.0/16Private-2 Subnets CIDR block For example
10.0.4.0/16

Edit Subnet Settings:
Enable Auto-assign IP
Only enable Public Subnets
{ public-1 , public-2 }

🔹 Create Internet Gateway
Name: Choose
Internet-GatAttach to VPC: MY_VPC

🔹 Create Route Table (for Public Subnets)
Name: Public-Route-Table
Edit Routes:
- Add Route:
0.0.0.0/0(Internet Gat) - Target ( indicate all internet-bound traffic.)
- Add Route:

Edit Subnet Association:
- Add Public Subnets
{ public-1 , public-2 }
- Add Public Subnets

🔹 Create NAT Gateway
Name: Choose
NAT-GatewaySelect Public Subnet
Allocation: Elastic IP
public-1

🔹 Create Route Table (for Private Subnets)
Name: Private-Route-Table
Edit Routes:
- Add Route:
0.0.0.0/0(NAT Gateway) - Target
- Add Route:
Edit Subnet Association:
- Add Private Subnets
Launch Instances
🔹 Public Instance
Name: Public-Instance
Key Pair Name: Choose a key pair
Edit Network Settings:
VPC: MY_VPC
Subnet: Public-2
Enable Public IP

🔹 Private Instance
Name: Private-Instance
Key Pair Name: Choose a key pair
Edit Network Settings:
VPC: MY_VPC
Subnet: Private-1
Disable Public IP
create a VPC with NAT Gateway, enabling secure outbound internet access for resources within private subnets while maintaining network isolation and security.
